What To Consider Before Changing Your Car’s Paint Color

What To Consider Before Changing Your Car’s Paint Color

Changing your vehicle’s paint color involves many considerations and decisions. If you have an older, or even newer, vehicle in good shape, you may want to use the same color to renew its original vibrancy. You may want to change color altogether to achieve an updated or different look. There are some factors that you need to consider before taking the color change plunge. Here are some of those critical details you shouldn’t forget to take into account:

Paint Deterioration

 If the paint on your current vehicle is showing wear from simple age, years of exposure to extreme temperature changes, and plain old everyday wear and tear, it may be time to consider a new paint job. Though the original paint may have been factory perfect, enough time will deteriorate any paint job. When the paint on your vehicle shows extreme fading as well as cracking, peeling, scratches, and bare spots, it’s probably time to evaluate whether the paint on your vehicle has reached that stage. 

Expense

 The cost of painting a vehicle is always going to come into play. Painting almost any vehicle, regardless of its size or color, is going to be expensive. A new coat of paint is going to be less costly than purchasing a new vehicle, but there are still factors to weigh when trying to keep the expenses of painting to a minimum. The least expensive paint jobs available are usually through discount oriented paint companies with fast turnaround times, but as the saying goes, “you get what you pay for.” If your vehicle needs a decent and lasting paint job, you’re better off spending a little more at a reputable shop with expert paint technicians who are willing to go the extra mile. 

Color Changes

 Changing a vehicle’s original color to another color is going to increase a paint job two-fold. That added expense is due to the exterior parts of a vehicle’s body being regularly exposed to the elements, as opposed to interior areas that are hidden from view like a trunk, hood, engine, door jams, and other surfaces and openings. When the outside color is dramatically changed, then the interior parts will have to go through the same process at a higher price to ensure the colors match. 

 Another aspect to think about when you want a complete color change is that you won’t be able to reverse your choice to another color, or back to your vehicle’s original color, once your vehicle has gone through the painting process. Most of the original paint and any original sealant will have been stripped away. So, you need to think hard about a color choice long before your vehicle is in the body shop. 

Complete Removal

 If you plan on a total color change with your vehicle, be prepared. The interior of your vehicle will be stripped of both interior and exterior parts to do the job right. That means the removal of the seats, console, panels, trim pieces, and even the engine and other major components. You can save by going to a two-tone appearance with all those hidden spots, like the inside of the trunk, engine compartment, and door areas. The entire color change process is one reason why shops charge higher rates for a complete color change; whereas, there is usually a reduction in price and savings with the two-tone effect. 

Resale Value in Color Change

 Another important factor to be aware of with a complete color change is the effect it has on the resale value of a vehicle. Unfortunately, that value is usually affected negatively. Most repaints, regardless of the condition or appearance of the vehicle, will likely not increase its value. The same is true, if not more so, when it comes to more valuable vehicles. Most people want to remember the original factory colors on older or antique vehicles. If you’re planning on keeping your newly painted vehicle, the resale value is not as critical. If you are contemplating selling it, you should probably keep its original color to make a faster and more profitable sale. 

Never Going to Look the Same

 Any repaint job is never going to look the same as the original, fresh off the assembly line paint job. When someone other than the manufacturer applies the paint, it’s simply not going to look like the original. The reason for this is that the factory painting process involves the use of equipment that is specialized for the job. A new paint job will usually look good, but it just won’t be the genuine article. 

Lots of Preparation and Time

 Preparing a vehicle for a complete paint job means removing any clear coat and wax, as well as a good portion of the original paint. When a vehicle has major imperfections, dents, scratches, cracks, or other issues, all of these areas will have to be sealed, filled, sanded, and smoothed out. A lot of preparation is involved with scuffing up the painted areas and applying several primer coats to make sure any remnants of the old paint aren’t allowed to come through and combine with the new paint.

 Some less costly painting companies can complete a vehicle paint job within a couple of days, but with a more precise and thorough paint job, it’s going to take at least a week. The painting process involves a significant amount of work and time with a complete repaint, particularly when a new color is required. The job entails several days, not a few hours. You’ll need to be prepared to let go of your vehicle and make plans ahead of time for a rental car or another ride. 

 There are many factors outlined here that you should consider before changing your car’s paint color. Sometimes, the cheap route seems like a quick fix, but in the long run, finding a reliable paint and body shop with experienced technicians is the answer to giving your vehicle the superior paint job it deserves. If you are unsure of what choices to make when repainting your vehicle, complete the online contact form and an experienced technician will get back to you with the information you need to make the right color choice for you and your vehicle.

5 Ways To Prepare Your Car For Winter

5 Ways To Prepare Your Car For Winter

Winter is just around the corner, and it’s time to start making preparations. Unless you are lucky enough to live in a place where it never snows, you will certainly need to take a few precautions to make sure that your vehicle can make it through the rough months ahead. In this article, we will go over five of the things that you really need to do (right now) in order to prepare your car for the winter.

1. Get An Engine Tune-Up

When it’s cold outside, the oil in your engine will become thicker. This isn’t a huge problem, but it does make it harder to start the car. At this point, any little problem in your engine or ignition system will make the situation worse. All of these problems might combine to create a situation where your vehicle won’t start at all.

A tune-up can include a lot of things, as it’s just a general term for preventative maintenance. The job might include replacement of filters, spark plugs, spark plug wires, replacement of the distributor cap and/or its internal rotor, oxygen sensors, or PCV valves. Talk to your mechanic and make sure that all of your vehicle’s needs are met.

2. Replace All Fluids And Filters

If you think about it, there are quite a few liquids that we put into our vehicles. There’s oil (which isn’t really a liquid but functions like one), transmission fluid, brake fluid, radiator coolant, power steering fluid, windshield washer fluid, and your vehicle may have others. That’s a lot of liquid that could possibly freeze. Even if these substances do not freeze in the winter (and many of them do not), they will still become thicker and less able to move through the system quickly.

All of those liquids that we put into our cars tend to break down over time. This is just a natural consequence of those liquids having done their job. So, before winter gets here, you should immediately do an oil change, and change all of your other fluids as well.

3. Buy Some Fuel De-Icer

Ideally, you should always buy premium gas that is free of fillers. However, most of us just can’t afford to do that. For the vast majority of the population, regular gas is the norm. That means that your car will end up burning more than just gasoline. As you probably know, gasoline does not freeze. However, some of the filler substances will thicken or freeze.

You can deal with this problem before it happens by stocking up on fuel de-icer, also known as gas-line antifreeze. It’s not hard to use, either. All you have to do is empty the bottle into your gas tank once a month. Of course, the instructions could vary somewhat, depending on what brand you buy. Either way, this stuff can go a long way toward keeping your vehicle functioning well in the snowy winter months.

4. See To Your Windshield And Heater

Have you ever noticed that car heaters tend to stop working right when you need them most? Those things always seem to break down right around the time when the weather is at its coldest. If you think about it, that makes a lot of sense. The heater will be working its hardest during the coldest months, and that makes it more likely to break down. You can deal with this issue by getting your heating system inspected and repaired before you actually need to use the thing. That way, your heater can go into the winter fresh and prepared to do its job.

We should also talk about your windshield. Ice on the windshield is probably the most annoying thing about winter driving. Unless you feel like getting real familiar with that scraper, we would advise that you also have your defrosting system inspected and repaired if necessary. It should be mentioned that heating/defrost systems are not that complicated. If you are technically inclined, you might want to do some DIY work.

5. Check For And Correct Any Electrical Issues

You may already know this, but car batteries just don’t work as well during the winter. If you want to know why this is, take a look at the label on a car battery some time. You will see two sets of numbers marked “CA” and “CCA.” That first one stands for “cranking amps,” and it’s a measure of how much power the battery can put out at one time.

The numbers marked “CCA” stand for “cold cranking amps.” You will notice that the CCA number is always lower than the CA number. This is all the proof we need to understand that car batteries don’t put out as much power when they’re cold. That’s why you need to make sure that your battery (and everything to which it is connected) is in good shape before the weather gets cold.

You can buy an electrical tester, but most auto parts stores will check your electrical system for free. Make sure they check the battery, alternator, starter, and ignition coils. If even one of these parts stops working, it can cause the whole system to malfunction.

Conclusion

Even in the modern age, the weather still presents us with certain problems that must be overcome. There are some other things that you can do to prepare yourself and your vehicle for the winter. However, it would be outside the scope of this article to go into the entire list. We would recommend that you do some further reading, and you will see that we have given you the five most important points. We thank you for reading this article, and we ask that you do us one more favor and fill out the contact form below. That will enable us to continue educating you about all kinds of useful topics like this.

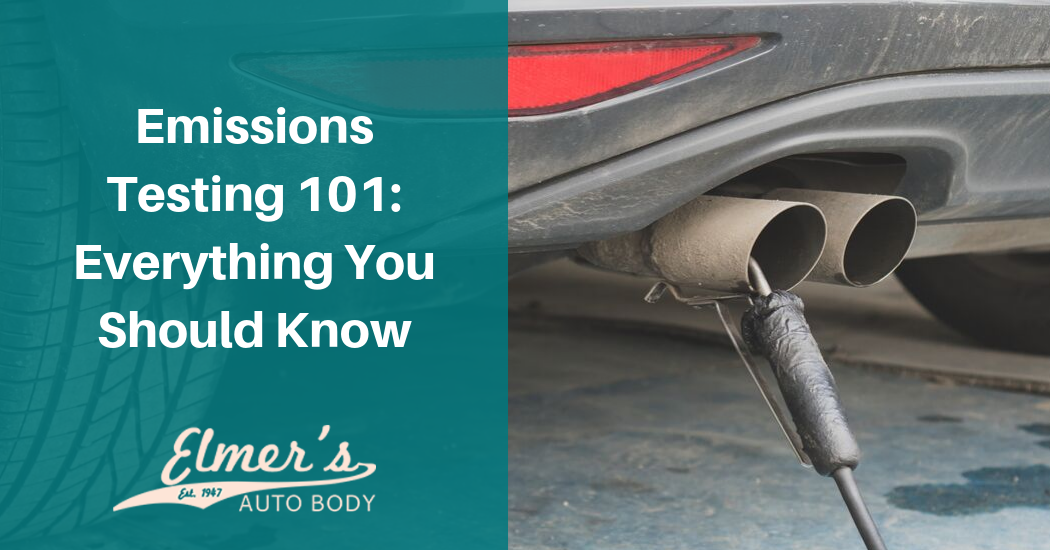
Emissions Testing 101: Everything You Should Know

Emissions Testing 101: Everything You Should Know

Emissions Testing has been in existence since the state of California initiated the process in 1966. Subsequently, other states followed suit and required testing. There are 32 states that conduct inspections that have varying factors that influence an emissions inspection. Failure to pass an emissions test means making adjustments and repairs with follow up retesting.

Varying Factors Influencing Emissions Testing

There are varying factors that influence emissions testing through the states that currently conduct inspections. Those factors include:

  • The age of the vehicle
  • The type and weight of the vehicle
  • The kind of fuel or power that a vehicle utilizes
  • The kind of use the vehicle engages in, which require yearly inspections
  • The local area as whether urban or in a particular zip code
  • The registration of a vehicle whether in or outside of a state

Emissions Testing Specifications

States involved in vehicle emissions testing determine their own terms and conditions. Testing usually consists of detecting for levels of:

  • carbon dioxide
  • carbon monoxide
  • hydrocarbons
  • nitrogen oxide
  • emissions concerning evaporation

Differences in Emissions Testing and Vehicle Safety Inspection

These two operations are usually separate in nature, but various state emission and vehicle safety inspection locations may have available equipment to perform both procedures.

Cost of Emission Testing

Again, the cost for emissions testing differs from state to state. Most costs can be anywhere from $15-$25. Vehicles that require yearly testing pay lower fees.

Emissions Test Failures

There are states that offer free retesting if a an initial test is failed. With states that do require emission testing, a vehicle has to go through a repair process in order to fulfill emission requirements. Assistance with repairs for lower-income individuals is made available, in some states and under certain instances, and waivers may also be given under certain circumstances.

Testing Failure Causes

  • Fuel Mixtures – There are any number of mechanically related problems that can cause the release of pollutants. Mechanical issues can cause a vehicle to release excess pollutants. As an example, rich fuel mixtures can heighten the release of higher levels of carbon dioxide.
  • Air Injection – A faulty air injection system can also lead to the release of higher levels of hydrocarbons and even carbon monoxide.
  • Spark plugs – Worn spark plugs can cause increased gas emissions. They should be inspected and replaced when necessary.
  • Gas cap leakage – A leaking gas cap seems trivial but it can cause emission test failure If leaks are emanating from yours, replace it with a sealed one that has a secure seal.
  • Check Engine light – A malfunctioning check engine light can cause an emissions test failure, even when every other test has been successfully passed. The check engine light is an indication that the OBD-II device has found a failure or flaw in a the emissions control of a vehicle.
  • Unclean air filter – A dirty air filter can contain elevated hydrocarbons that can cause it to be clogged. An air filter is another part that requires cleaning and replacing if necessary.
  • Catalytic Converter – A catalytic converter should be inspected before any emissions testing is performed. If it is damaged, toxic gases will not be converted from harmful to those that are not dangerous to the environment and public health.
  • EVAP or Evaporative Emission Control System – If this system is malfunctioning, vapors from the gas tank will pollute the environment. The cause of this is usually attributed to hoses or vents that are leaking.

Other Problems Concerning Emission Testing Failures

  • oxygen sensor impairment
  • ignition system flaws
  • vacuum system leaks

Repair Costs for Emissions Problems

Any repair costs that involve remedying emission problems are going to depend on the actual vehicle make and issues with the vehicle. Transmission related repairs could run in the hundreds of dollars, or even into the thousands, while a single replacement, such as an oxygen sensor could run around $100.

Diagnostic Testing

Diagnostic testing can be performed by a qualified mechanic, which should reveal what failures were noted in previous emissions testing. A mechanic will have to have the necessary tools and expertise to determine whether the problems lie. Also, an individual vehicle owner can also use a diagnostic program tool but most of these monitoring devices are only set up to identify a problem, not completely solve it.

Maintenance is a critical issue when it comes to emissions testing. If you take care of and maintain your vehicle before any testing is performed, you should be able to pass the various emissions testing monitors. It is important to have a professional mechanic take a look at your vehicle to determine if repairs or replacements are needed before any emissions or safety inspections are completed. If you are uneasy about an upcoming emissions test or inspection and need answers to your questions about the process, complete the online contact form, and an expert will get back to you as soon as possible with those answers.

FAQs For Mechanical Repairs

You hear the term “preventative maintenance” thrown around with machinery – especially vehicles – a lot. You’ve probably never questioned the validity of this idea, after all, it makes sense that regular maintenance to prevent problems before they can happen, would be wise.

But, has a mechanic or “gearhead” ever told you that your preventative maintenance is lacking, despite your being sure that you check all the boxes on that. You keep your tires inflated properly, you keep your oil and fluids topped off, you get regularly-scheduled diagnostics and tune ups done. What else is there, aside from general upkeep?

Well, on a microscopic level, that’s mostly what you need, if you follow it all within the right parameters. However, on a more macroscopic level, that’s only scratching the surface. Today, we’d like to go over some FAQs about preventative maintenance. Some of this you can do yourself easily, but a lot of it should be handled by trained professionals – you can’t take chances with your vehicle, now can you?

What’s Involved in Preventative Maintenance?

First, let’s go over the various things that should be done, and a brief look at why.

  • Safety Inspection – Brakes can wear down, steering can break down, and airbags can sort of “expire” from disuse in some cases. Frequent checks to be sure these are all in working order is crucial. This includes brake lining, hydraulic lines, calipers and wheel cylinders.
  • Fluid Flushing/Change – Fluids in your vehicle are something you’re probably somewhat used to having to tend to. Oil depletes and becomes dirty. Antifreeze breaks down and becomes dirty and viscous, and so on. But, you should also flush/top off power steering fluid, brake fluid and other hydraulic fluids as they break down/deplete as well.
  • Other Oils – Motor oil isn’t the only oil your car has. You should also have differential gear oil changes, as well as trans-axle oil changes done.
  • Filters – Your filters become dirty over time, and while some filter designs can be washed our hosed out, it’s better to just replace them. These include air filters, (cabin and engine), as well as oil filters.
  • Belts and Gaskets – Belts become loose and worn out, and gaskets break down over time as well. These should be replaced or at least inspected regularly.
  • Hoses – Hoses can wear out due to heat or contaminants building up, and these are critical for delivering fluids where they need to be, like veins in a body. They need checked and/or replaced often.
  • Additional – Regular tune ups, windshield wiper service, spark plugs, electrical checks, and battery services should be done frequently – you probably already see to this kind of regular servicing, right?

When to Do These

So, now you know what goes into this, but when should these all be done?

  • Via Owner’s Manual – The following should be done per owner’s manual specifications: Valves, oxygen sensors.
  • Belts – Your drive and timing belts should be replaced every 4 years or 60,000mi.
  • Oil /Filter – Your oil filter and a complete lube change should be done every 3,000-5,000mi.
  • Air Conditioning – Every spring.
  • Tire Rotation – Every 5,000mi.
  • Yearly Services – These should be done yearly and/or as needed: Fuel filter, Battery Service, brake system and clutch system flushing, PCV valve inspection/replacement.
  • Every 2 Years – These should be done every 2 years and/or as needed: Radiator coolant, engine oil flushing, automatic transmission flushing, power steering flushing, EGR system service, carbon cleaning, throttle-body service, radiator coolant.

These aren’t all of the services that should be handled, as an entire car diagnostic, computer code scan, and other systems can very widely, but should be tended to often. To learn more, fill out our contact form today or give us a call!

How To Give Your Car That New Look

Let’s be honest with ourselves – our cars are like our home away from home. We’re in the things an awful lot, commuting to and from work, running errands, taking our family out on their business. We spend most of our lives anywhere but our actual homes, but it’s only our actual homes that we seem able to keep in pristine condition. Perhaps these go hand in hand and make sense really.

But we all hate it when our cars begin to smell unpleasant, seem worn down and dirty, and downright not in new condition. This is why when we have to travel, we actually don’t mind luxuriating in a rental car – they always smell and feel like new, just like good hotel rooms do.

Wouldn’t it be nice if we could make our own cars feel like new? Well, of course, a good body shop and detailer can actually do this, albeit for a hefty price. Well, most of us can’t afford that sort of thing, not with the ongoing costs of living, regardless the economic climate of any given time.

Thankfully, there are various things that can be done to achieve a more like-new look, feel and experience for your vehicle. A lot of them are very affordable, though we’ll be looking at a range of cheap to costly solutions, all of which are still cheaper than having restoration services done, by a landslide.

Cheap Fixes

  • Cleaning and Organizing – This is the most obvious solution, but you’d be amazed at the improvement simple cleaning and organizing can do. You’ll feel like your car is so much roomier, and in such better condition by simply getting all the trash, clutter and dirt out. Vacuum, dust, and of course, any leather-like surfaces should get a fresh coat of Armorall or something similar. Complete this with a nice air freshener – new car smell is an obvious but great choice to achieve the desired effect.
  • New Floor Mats – Floor mats get worn out and cultivate stains over time, and a lot of smells tend to breed in them. New floor mats can go a long way towards a newer-feeling environment.
  • New Windshield Wipers and Clean Windows – Your windshield is contributing to your car’s aged, worn down vibe, even if you don’t realize it. You can think you have pristine visibility until you actually experience the pristine visibility fresh blades and wipers can provide. Further this with properly-cleaned windows – inside and out – with good glass cleaner and a non-abrasive chamois.
  • Dent and Scratch Repair – You can DIY some of this, but it’s best to have dents and scratches dealt with by a proper body shop. Dents, where the paint isn’t damaged, can be fixed with paintless dent removal, too.
  • Maintenance – Maintain a newer feel and handling by regularly changing your oil, topping off your fluids, and having a skilled mechanic do regular tune-ups and conditioning!

Slightly Costlier

  • Seat and Carpet Shampooing – Having your seats and carpets regularly shampooed can keep them feeling and looking new. It’s not that expensive, but it’s not cheap either.
  • Upgrade Your Systems – Modernizing your car’s systems, such as adding dash displays and mobile interfaces, new sound systems and so on, while frills, do make for a modern, newer-feeling vehicle.

Expensive

  • Replacing Beat Up Components – Replacing beat up panels, fenders, bumpers, hub caps and other components obviously makes for a newer feel.
  • New Paint Job – A new paint job will make your car look new – there’s a reason classic cars, restored, look so cherry.
  • New Wheels – A smoother ride, which is like visibility in you noticing it only when you get it back – can be achieved with new wheels.

To learn more ways to get more life and a better experience from your vehicle, call us or fill out our contact form today!

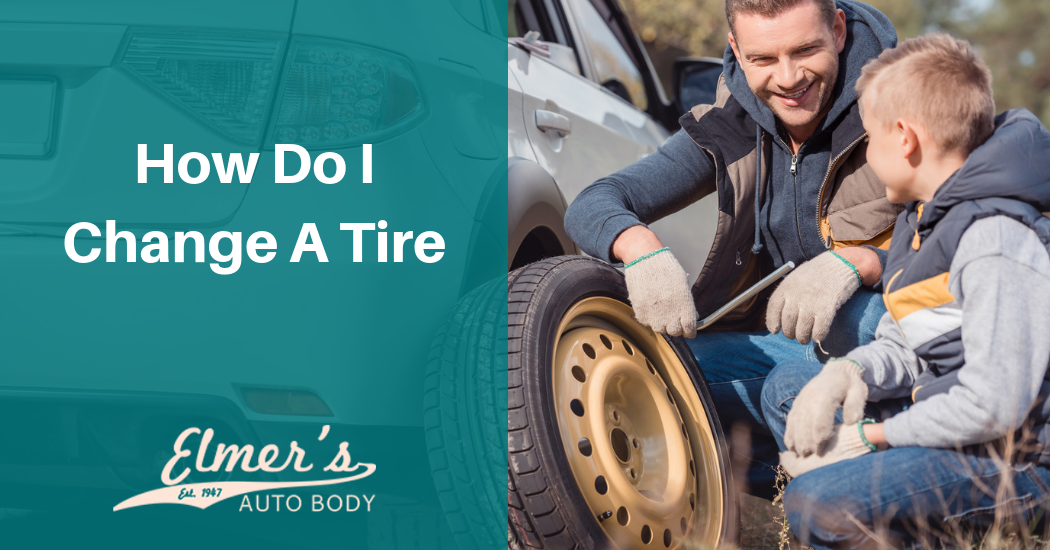
How Do I Change A Tire?

One of the most common “accidents” we encounter with our vehicles, aside from perhaps the errant shopping cart in parking lots, is the flat tire. Tires are, for better or worse, designed to have some give to them. There’s a reason for this – flexibility allows tires to actually last longer, and handle rougher surfaces and terrain, as well as provide smoother rides. Wheels aren’t solid masses for very good reason, in other words.

Well, this can result in unfortunate incidents like tires rupturing suddenly (which at high velocities can result in a scary moment or two), or simply develop leaks or be punctured by something hard to see, like nails or, well, you name it. On top of this, they do just wear out over time, and bald tires are actually more dangerous than flats due to the lack of control and traction that results.

This means that sooner or later, you’re going to find yourself in a situation where you need to change a tire, because you’re stuck on the road, and can’t get to a mechanic. It’s understandable that a lot of people don’t know how to handle automotive things, especially people who live in suburban or metropolitan areas where affordable mechanic service is easily accessed under nominal circumstances. But, take heart, changing a tire is easy, and a skill you’ll be glad to have.

What You Need

To physically change the tire, all you actually need is a jack and a tire iron or heavy-gauge socket wrench of appropriate size. However, for safety purposes, you should also have a flash light, safety flares and probably a rain coat or poncho.

Getting to Safety

First, if you have a flat on the road, which is often the case (it happens where it’s the least convenient nine out of ten times), first, pull safely off to the shoulder, or into a parking lot or driveway if no shoulder or level ground is accessible.

Put your hazard lights on immediately, and if it’s night, light your flares for ten to twenty feet in a row behind the vehicle. This ensures that other traffic has plenty of time to avoid being dangerously close.

If it’s raining, you’ll be glad you packed the poncho or raincoat.

Using the Jack

First thing’s first – you need to get the weight off the tire, and get clearance to remove it. There are a couple kinds of jacks, but most of them simply use a pump action to lift the top part. There will probably be a lip underneath your car on each side, but if not, simply find a good, wide flat surface under there to brace it against. Obviously, lift it on the side where your flat is, and try to get it at least six inches if not more like ten, off the ground.

Removing the Flat

Next, you’ll want to remove the flat tire. First, the hub cap needs to come off. With some wheel designs, this just pops off. If it’s bolted by the lug nuts, which occasionally is the case, it’ll come off with the tire. Simple elbow grease (remember, lefty loosey, righty tightey), the tire iron will remove the lug nuts. If the hub cap came off first, place them in the concave bowl of the cap. If not, put them on the car seat. Do not lie them on the ground.

The tire will slide off at this point with relative ease, but be aware it’ll be heavy.

Adding the Spare/New Tire

The new tire will slide back in the way the previous one went on. Replace the lug nuts, tightening them as much as they can possibly go. If the hub cap snaps on, simply place it back.

The jack will lower either by turning the pump handle, or by removing it. It should lower fairly gently, but make sure you’re clear of the car before doing so.

Make sure you extinguish any flares before leaving.

Congratulations, you’ve changed a tire, and aside from a little physical strength being involved, it’s really quite easy, isn’t it? Consider having your new tire rotated once you get to civilization.

To learn more tips and tricks to save a world of grief, fill out our contact form today!